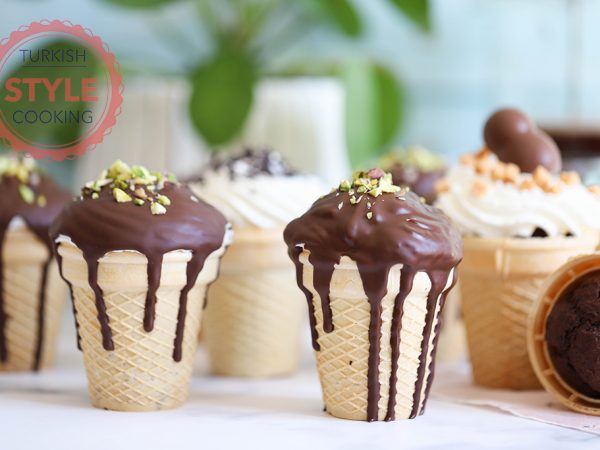
Ice Cream Cone Cupcake Recipe

Although the cone cupcake looks very stylish and flashy, it is a very simple recipe in terms of making steps. Its only feature is that the cake is baked by placing it in ice cream cones instead of muffin molds. Of course, this is what makes the recipe so elegant.
In order to use the cones without any problems, you need to choose cones with a blunt bottom and stand alone. Problems such as melting, burning and deformity do not occur in the cones entering the oven. There is not even the slightest problem that can bring them to mind.
You can eat cupcakes with or without a cone, just like you do when eating ice cream. The consistency of the cones is the same as when you first bought them, they do not lose their crispness.
I decorated the cones with plain whipped cream and chocolate, but the decoration is all up to creativity and the materials at hand. As you can make more elegant decorations, it is also possible to consume it in the form of plain muffins.
By the way, you can also make ice cream cones yourself at home. For this, you can use the ice cream cone recipe. After cooking the cones, instead of giving a cone shape, you can use metal muffin molds to shape them into bowls and use those cone bowls as muffin molds. I know it sounds a little tedious, but if you prepare the cones ahead of time, it won't be tiring at all.
Cone cupcake is made with yogurt, not milk, as in my favorite chocolate chip muffin recipe. Yogurt gives the cake a wet texture, befitting a cupcake, and in this way, it has a consistency more compatible with cream.
If you are not going to consume the cupcakes immediately, you should store them in the refrigerator, as you would with any dairy-containing food. You can also freeze it for up to 6 months. No extra processing is required for this. You can put it in the freezer in airtight containers. When you want to eat, it will be enough to put it in the refrigerator and wait until it thaws.
Enjoy the recipe
Ice Cream Cone Cupcake Recipe with Video
Ingredients
- 2 eggs,
- 3/4 cup of sugar,
- 1/2 cup of vegetable oil,
- 3 tablespoons of yoghurt,
- 1.5 cups of flour,
- 2 heaping teaspoon of cocoa powder,
- 10g of baking powder,
- Vanilla extract.
For the topping;
- 300 ml of whipped cream,
- 3 tablespoons of powdered sugar,
- 150 g of chocolate,
- Coarsely ground pistachios and/or candies.
Preparation
- Beat eggs and sugar,
- Add oil and yogurt and whisk,
- Mix all the powdered ingredients in a bowl and add little by little to the liquid mixture and whisk,
- Divide the mixture into the cones to fill 3/4 of the cones,
- Arrange the cones on the baking tray,
- Bake in a preheated oven at 180 C degrees until the toothpick test comes out clean,
- Take them out of the oven and wait for them to cool,
- Meanwhile, melt the chocolate bain marie or in the microwave and set it aside to let the temperature pass,
- Beat the cream in a narrow and deep bowl until it thickens,
- Add the powdered sugar and beat until well mixed,
- Take the whipped cream in a piping bag and squeeze it on the cooled cakes,
- Pour the chocolate over them to cover them,
- Decorate them with pistachios or any other material you want,
- Put it in the fridge and let it sit until the chocolate hardens.
Bon appétit...